Duo Security
Cisco Duo is a data security solution designed to protect online identities through features such as Multi-Factor Authentication (MFA). Pia has integrated with Duo to support Partners using Duo Security as their primary authenticator.
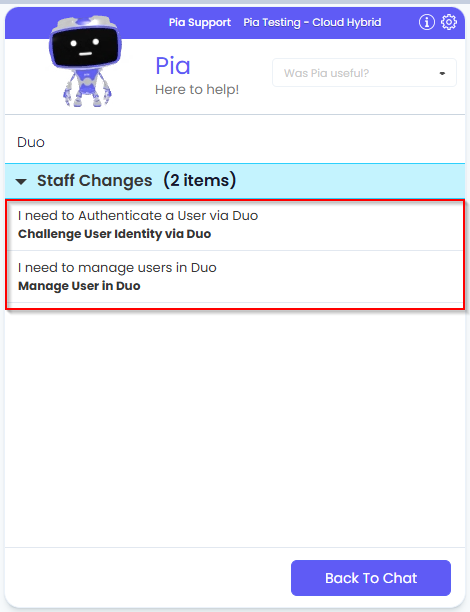
For partners using Duo Security, Pia has developed two automation workflows - Challenge User Identity via Duo and Manage User’s MFA.
To use these automations, a Duo integration must be configured.
Duo issues unique API keys for each client. Therefore, a custom integration is required so that you can securely store and manage separate configuration values for each client individually.
Automation Showcase
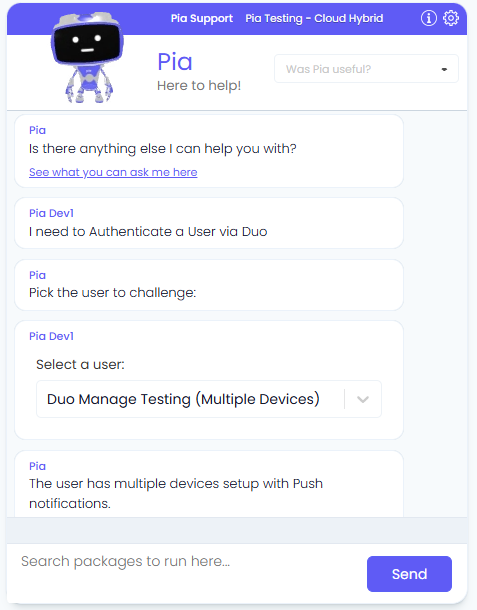
Challenge User Identity via Duo
With the Duo Integration, you can authenticate your clients using Duo before processing with their request. This helps the engineers to authenticate any user they are sceptical about and adds one more medium to authenticate apart from Microsoft.
Example request workflow
- Client calls the engineer to reset their password.
- Engineer runs the Challenge User Identity automation or the extension package before running the Reset Network Password automation.
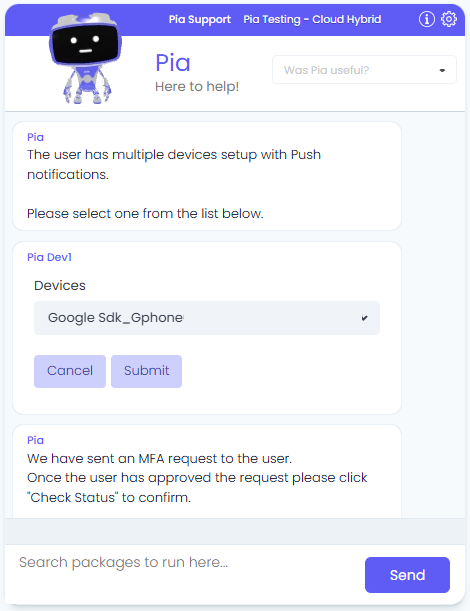
- The automation triggers a push notification in the client's Duo mobile app.
- Client is able to authenticate themselves by approving the request.
- Engineer proceeds with the Password Reset request.
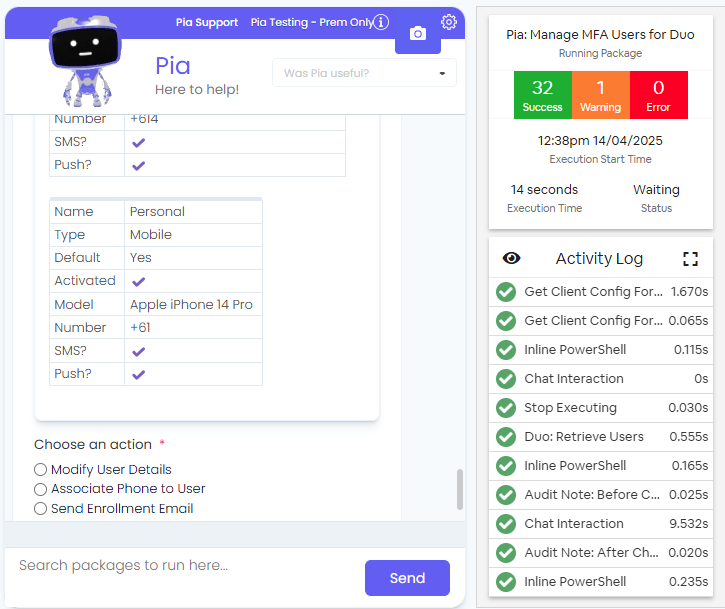
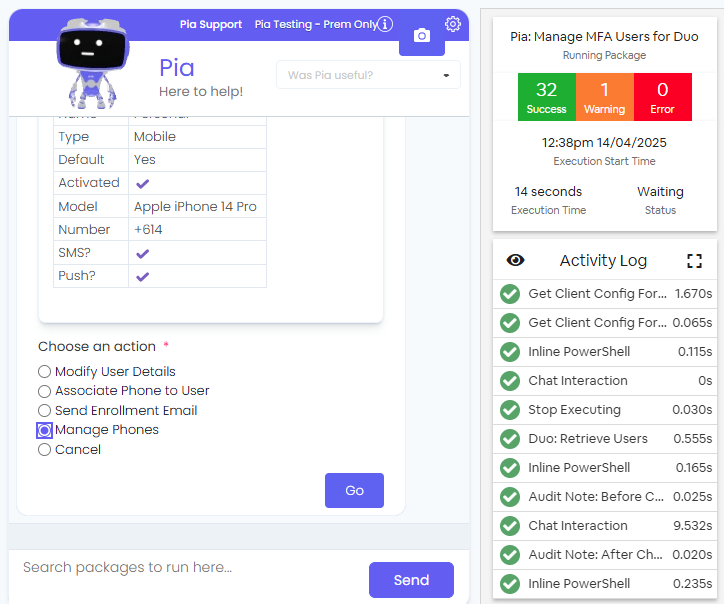
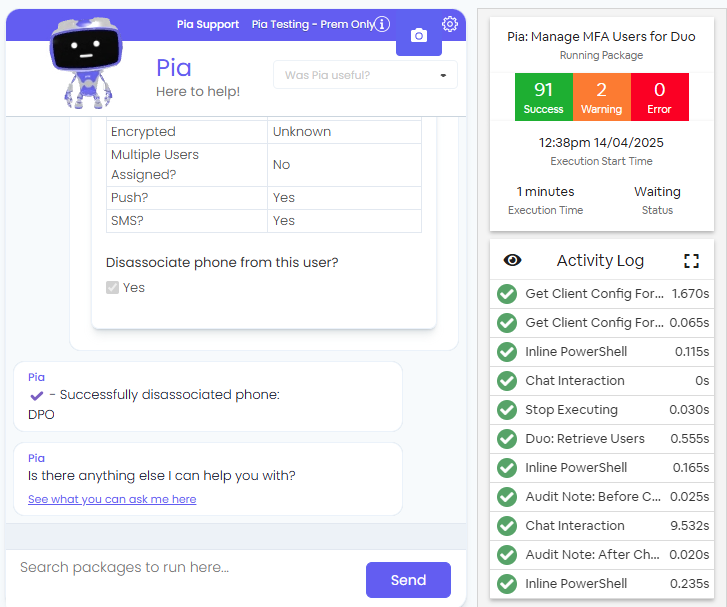
Manage MFA Users for Duo
The Manage MFA Users for Duo automation allows Partners to manage the users that have signed up for Duo Authentication. It provides the following solutions:
- Modify User Details
- Associate Phone to User
- Send Enrolment Email
- Manage Phones
Example request workflow
- Client submits a request to remove a number from Duo.
- Engineer runs the Manage MFA Users for Duo automation in the chatbot.
- The automation will remove the selected phone as an MFA method for the user.


Integration Setup Global
In this part of the setup, we are creating the custom integrations that will store the API keys for each of your clients. Learn more about custom integrations here.
Step 1: Login to your Pia Partner Portal.
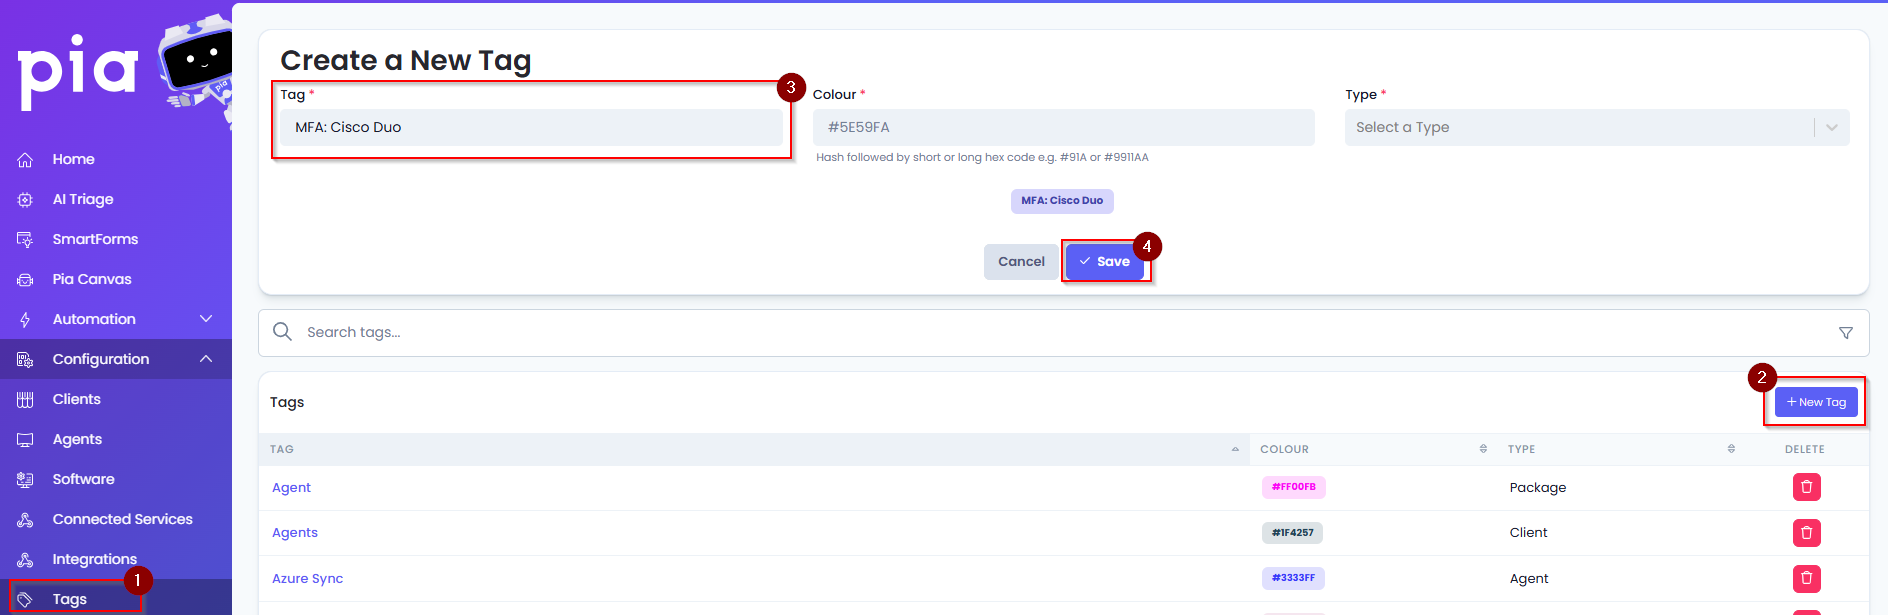
Step 2: Go to the Tags screen in the Partner Portal
Step 3: Click on the 'New Tag' button
Step 4: Create a new tag called 'MFA: Cisco Duo' and click Save
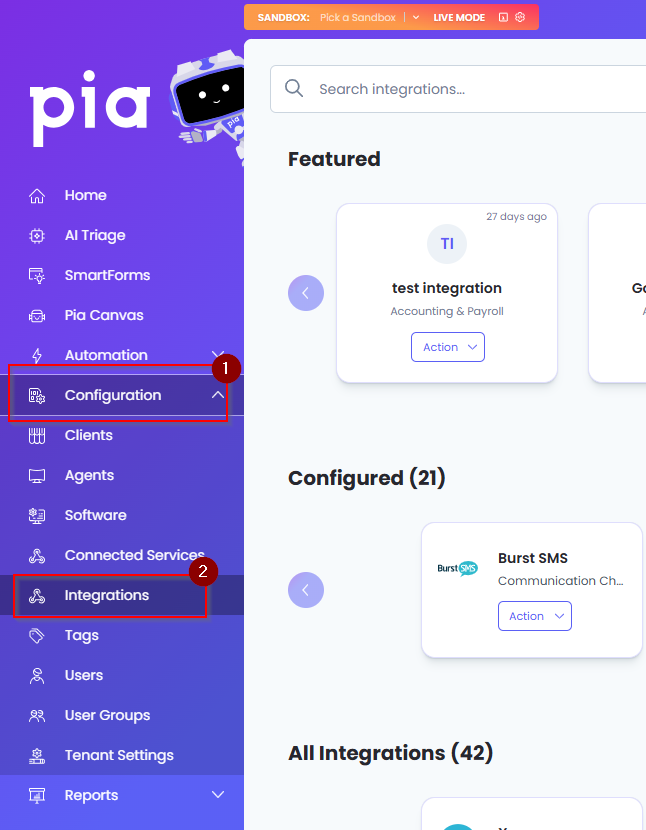
Step 5: Go to Configuration and navigate to the Integration menu option.
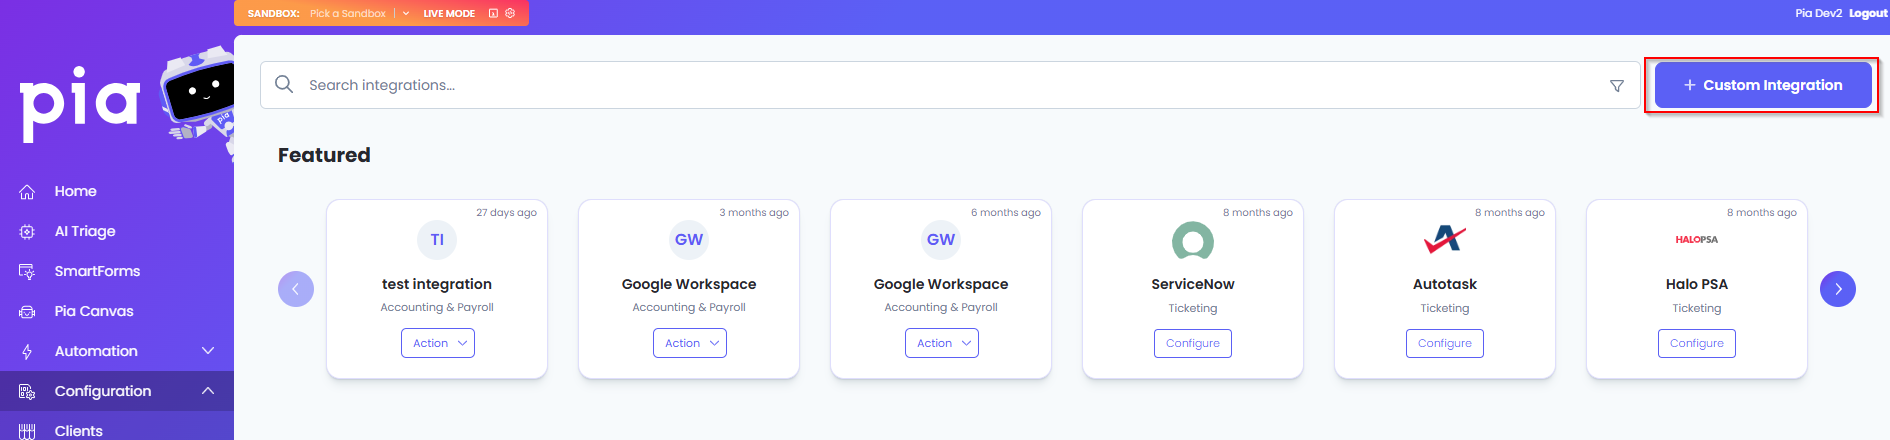
Step 6: In the Integration screen, click on the 'Custom Integration' button. This will give you option to create a new custom integration.
Step 7: In the New Integration screen, there are few details required to be filled out. These fields are broken down into 4 sections as shown below:
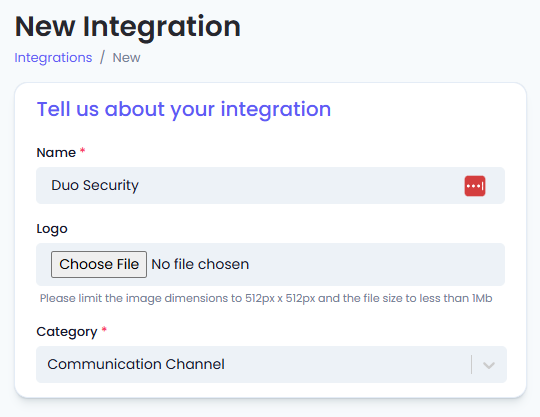
Tell us about your integration
- Name: Type 'Duo Security' or a relevant name for Duo
- Logo: Enter the logo for Duo
- Category: Select a category. For this example, Communication Channel has been selected
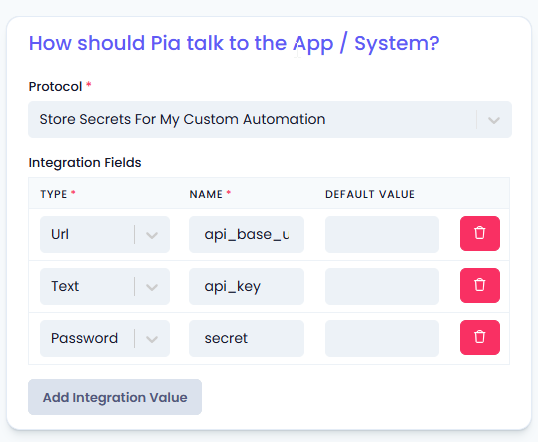
How should Pia talk to the App / System?
- Protocol: Select Store Secrets For My Custom Automation from the drop-down
- Integration Fields
- Type: Url
Name: api_base_url
Default Value: Leave this blank.- This field is for Duo URL/API Hostname we will collect later in this setup.
- Type: Text
Name: api_key
Default Value: Leave this blank.- This is the Integration key we will collect later in this setup.
- Type: Password
Name: secret
Default Value: Leave this blank.- This is the Secret Key we will collect later in this setup.
- Type: Url
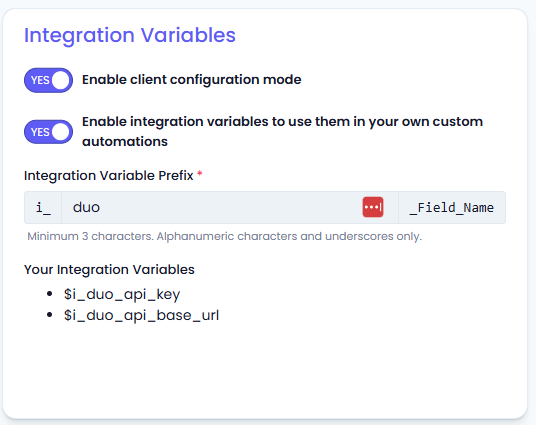
Integration Variables
- Enable Client Configuration mode: Turn this toggle ON to save individual API key values for each of your clients. This is a must for Duo Integration setup as you need to use separate API Keys per client.
- Enable integration variables to use them in your own custom automations: Keep this toggle ON so that you can use the integration variables in your custom automations
- Integration Variable Prefix: Create a prefix to use in your variable. For the purpose of this example, "duo" is used
Step 8: Once the initial setup is done, click on "Save & Configure" to configure the integration for each of your clients.
Integration Setup per Client
Continuing with the Duo setup, the next step is configuring Duo for each of your clients separately.
Step 1: Obtaining the API Credentials from Duo - You will need to do this for each client that you are configuring Duo for.
A short process is included below, however please be aware that the vendor application may change and you would be best to consult the vendor documentation for this information.
Follow the steps on this document to obtain API credentials from Duo: https://duo.com/docs/adminapi. Alternatively, you can follow the steps below:
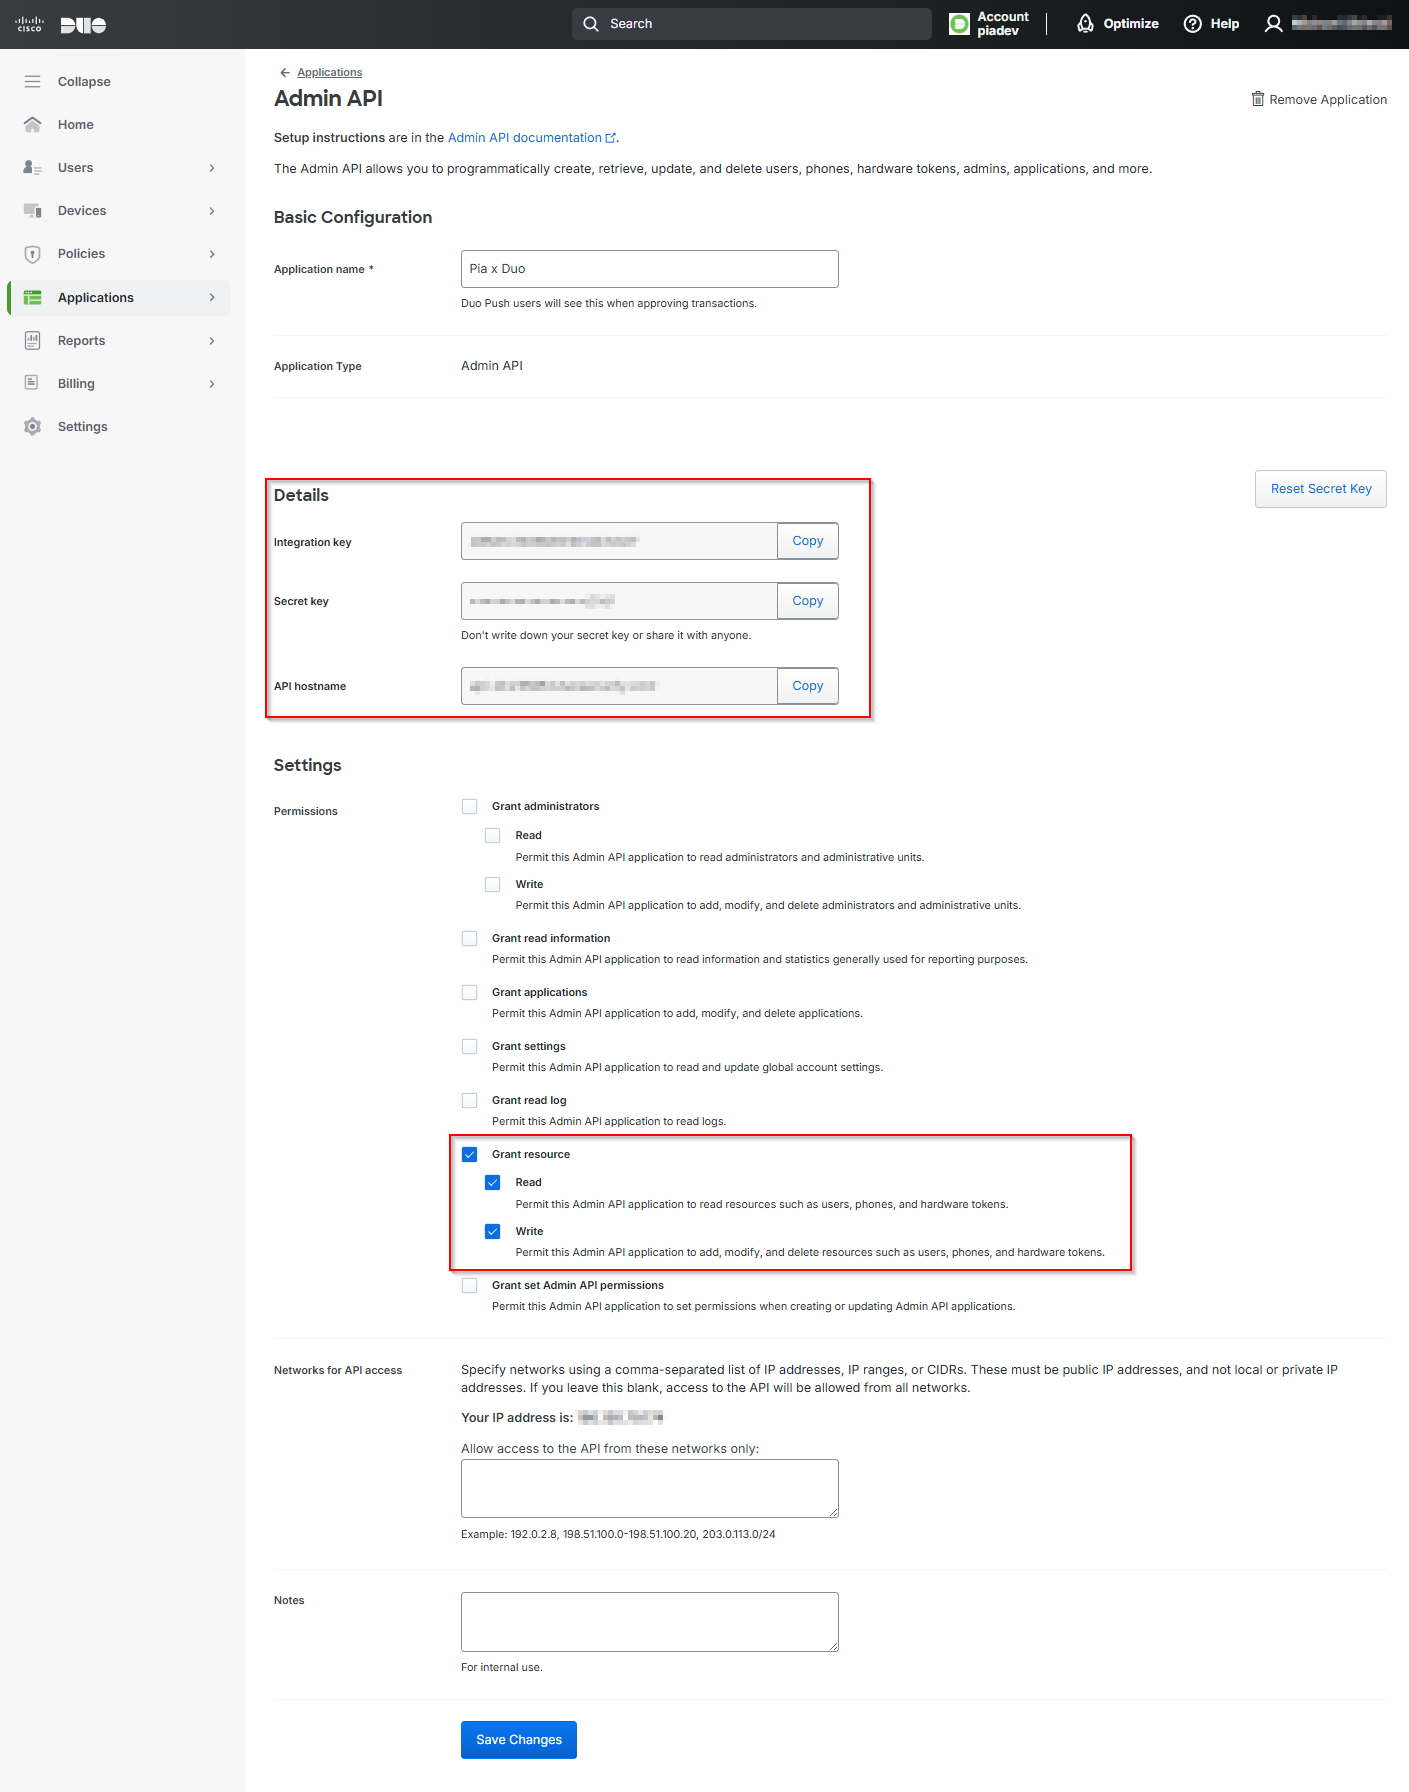
- Log in to the Duo Admin Panel and navigate to Applications → Application Catalog.
- Locate the entry for Admin API in the catalog. Click the + Add button to create the application, and get the following:
- Integration key (API Key)
- Secret key (Secret)
- API hostname (URL)
- Pia requires the following Permissions on the API for this integration:
- Grant resource - Read
- Grant resource - Write
- Optionally specify which IP addresses or ranges are allowed to use this Admin API application in Networks for API Access
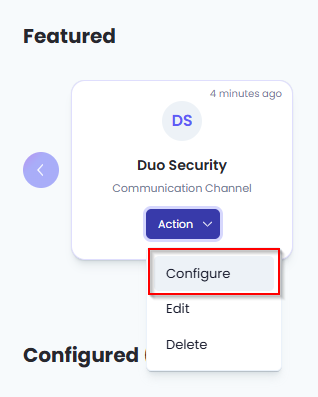
Step 2: Clicking on "Save & Configure" in Step 8 of the previous section will take you to the Configure Integration screen for Duo.
If you have just clicked on "Save", navigate to the Duo Security integration in the integration screen and click on Action>Configure.
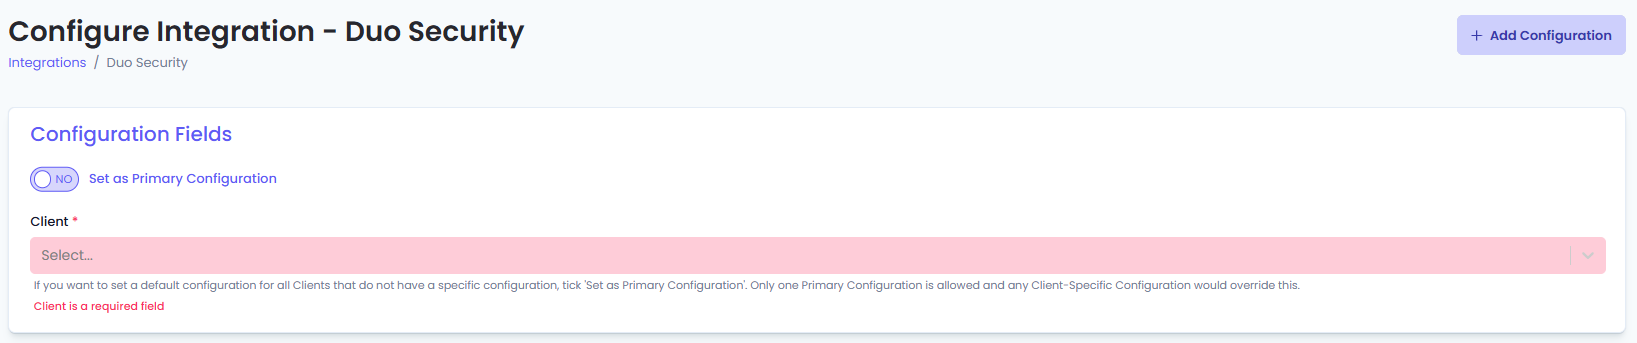
Step 3: In the Configure Integration page, fill in the form field for each of your clients as below:
Configuration Fields
- Set as Primary Configuration: For the purpose of this integration, this can be left disabled.
- Client: From the drop-down, select the client for whom you are configuring Duo.
Integration Fields
- API Key: Fill the API Key collected from Duo for the client.
- API Base URL: Fill the Duo URL/API Hostname collected from Duo for the client.
- Secret: Add the Secret key collected from Duo for the client.
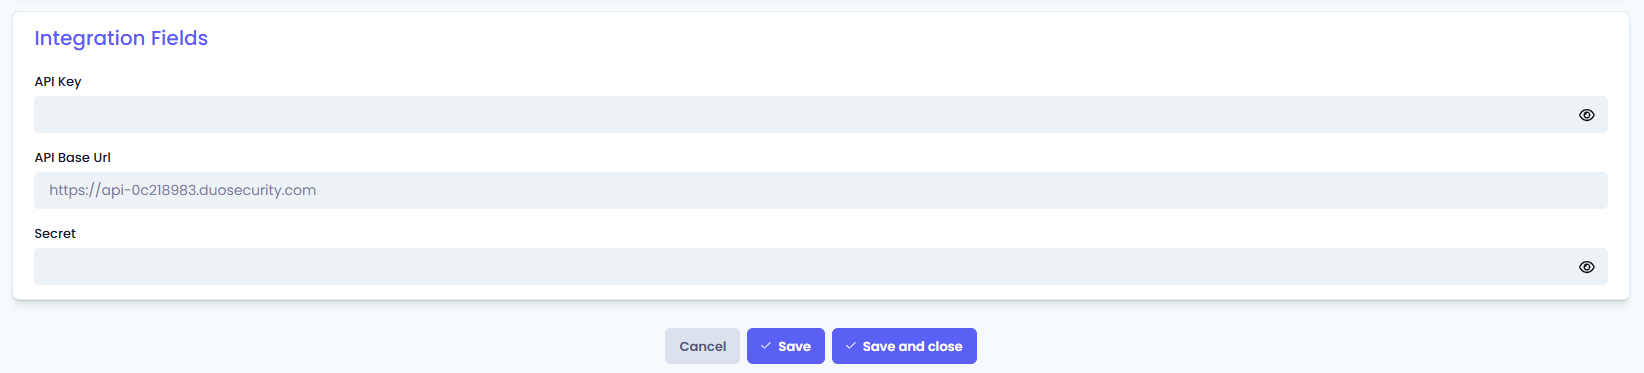
Step 4: Once done, Save your changes.
This completes Duo Integration configuration for the selected client. Repeat this for every client you wish to setup Duo for.
Step 5: Go to the Clients screen.
Step 6: Apply the tag that you created as a part of Global Integration Setup to your clients that are using the Duo Integration.
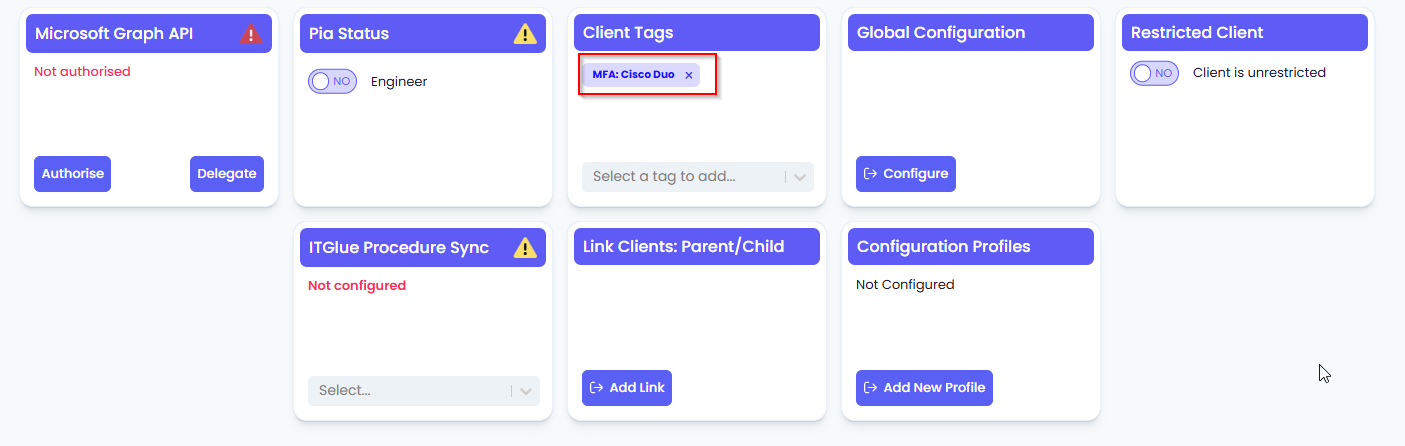
Once done, you will be able to see Duo automations in the Pia Chatbot for the clients that you have applied the tag to.
Configuring the Extension Points (Optional)
Contact your PSM to get access to the Duo Integration (or via Partner Support).
The Challenge User Identity via Duo Extension can be used in built in automations as well as custom automations. Refer to the below for the required configurations.
Navigate to the Pia Portal > Configuration > Clients > Select the appropriate package.
Click 'here' under Extension Automation.
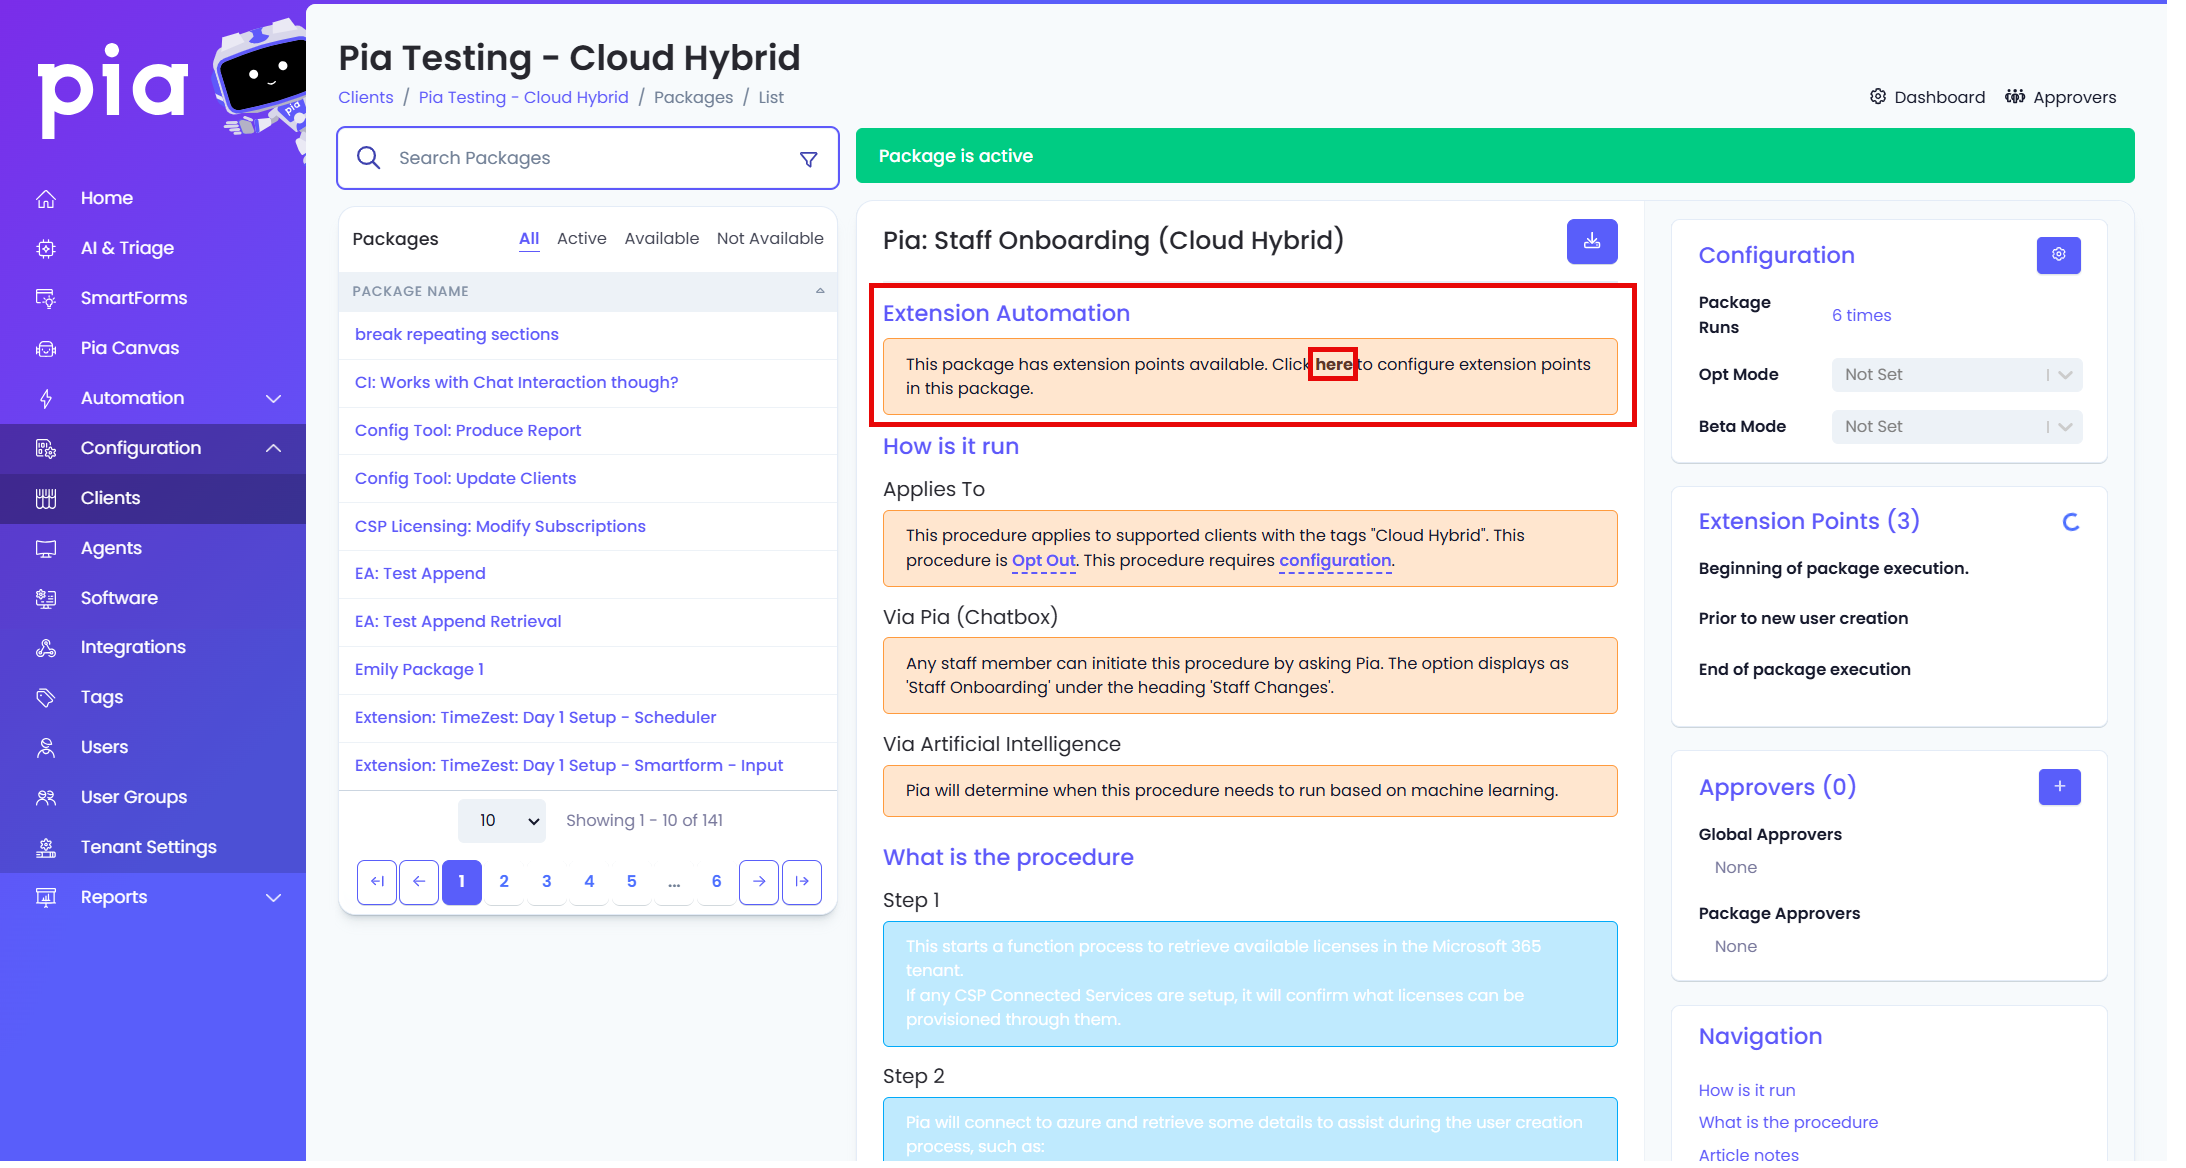
Refer to the screenshot below for the extension point/s you wish to configure:
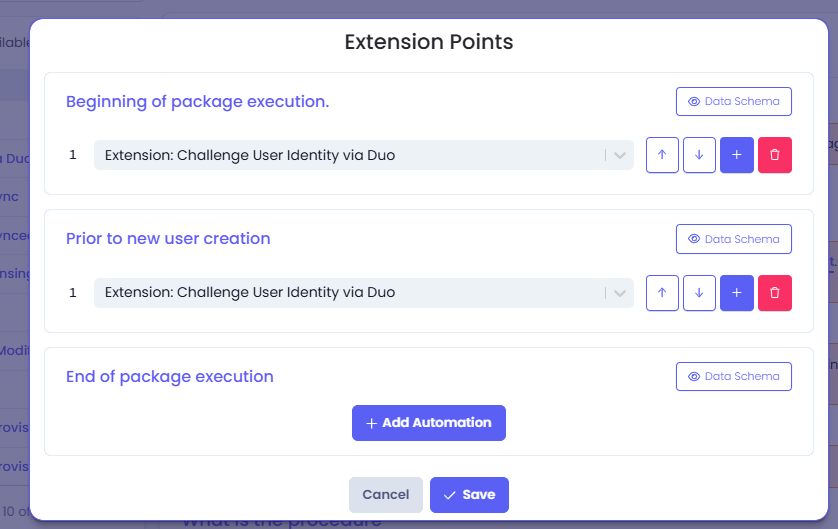
To learn more about configuring extensions, click here.